Ready to migrate from Pardot to HubSpot?
Many companies who rely on Salesforce and other CRMs choose Pardot as their marketing automation platform of choice. However, we find that HubSpot often provides more robust features, better service, and more flexibility than Pardot. That’s why we encourage our clients to make the switch from Pardot to HubSpot Marketing Hub.
If you’re looking to switch from Pardot, there are a lot of steps to take in the migration process - but we think it’s worth it. Here’s how to migrate from Pardot to HubSpot in 19 steps.
Administrative Tasks
01 Create and assign user roles
HubSpot provides a high level of control to the Super Admin to decide which users can make changes to different parts of the CRM. Click the Settings gear and choose Users & Teams from the left menu. Here, you’ll be able to navigate to Roles to add user roles and choose what each role can access within the Marketing Hub, Sales Hub, Service Hub, Reporting, and Account. Once your roles are set, you can create Teams to add users to, which will allow you to execute group tasks like assigning leads via round robin within a certain team.
02 Set up your subdomain and connect DNS
To build HubSpot landing pages or to send and receive emails through HubSpot, you’ll need to set up your subdomain on your DNS server. The subdomain can be anything you want - we usually see companies opt for terms like get. companyname.com or info.companyname.com. We usually recommend something like Get. yourdomain.com or go.yourdomain.com To set up your subdomain, navigate to the main Settings gear on the top right, then click Domains & URLs from the left menu. Here, you can click Connect a Domain and simply follow the steps to get your subdomain connected.
03 Add tracking code to your website
HubSpot includes powerful tracking to help you earn more inbound leads. Tracking allows you to know what content and emails a lead has looked at as well as enabling progressive form fields for cookied users.
Under Settings, choose Reporting from the left menu, then Tracking Code. Here, you’ll find the code you need to paste into the header of every page.
Pro Tip: For WordPress users, you can install the free HubSpot plugin to connect your HubSpot instance to your website without needing to worry about adding any code. |
04 Install the Salesforce connector
Access the app marketplace and install the HubSpot-Salesforce integration. This will pass data between HubSpot and Salesforce to maintain consistency between systems. It will also auto-map all of your Salesforce fields to HubSpot. You can then choose if you want to prioritize information from HubSpot, from Salesforce, or from whichever system is most recently updated.
Selective Sync
Do you need to limit which contacts sync from Salesforce to HubSpot? You can use HubSpot’s Selective Sync feature to do just that. However, note that this is an advanced feature that HubSpot’s support team doesn’t offer guidance on; you need to purchase additional implementation consulting if needed.
One example of when our clients have needed us to implement selective sync is to limit the contacts they have in HubSpot to only the ones they want to market to. For instance, if a customer uses Salesforce to track partners or resellers they may want to use selective sync to limit HubSpot to syncing with only prospects.
Sales Hub Tasks
05 Map HubSpot fields to Salesforce
While the connector brings your Salesforce fields to HubSpot, you can’t automatically send HubSpot fields to Salesforce. HubSpot includes built-in data enrichment fields including original source, number of employees, company revenue, and LinkedIn company page. You’ll need to create these fields in Salesforce so your sales team has all the information they can get.
06 Build lists
Next, we’re going to build lists so you can engage with groups of contacts within HubSpot.
Active vs Static HubSpot Lists
In HubSpot, there are two types of lists: active and static. These are the same as dynamic and static lists in Pardot. An active list updates automatically based on criteria while a static list represents one point in time.
We recommend identifying your top lists in Pardot and then migrating these as static lists. Then, rebuild your dynamic lists after importing your contacts. You can compare the numbers in each list to identify any sync issues you may have had.
.png)
Behavior and interaction-based lists
Both Pardot and HubSpot offer different ways to build lists based on activity, such as number of email opens or how recently an email was clicked. Unfortunately, you cannot migrate this activity from Pardot to HubSpot. Therefore, you’ll want to export based on these criteria and import into static lists in HubSpot to work from this data.
For instance, you may create a static list called Last email opened < 3 days ago. Using this list, you can build workflows and lead scores on your engaged contacts. This will be important later when you rebuild workflows that have contacts at varying stages of completion.
07 Set up lead scoring
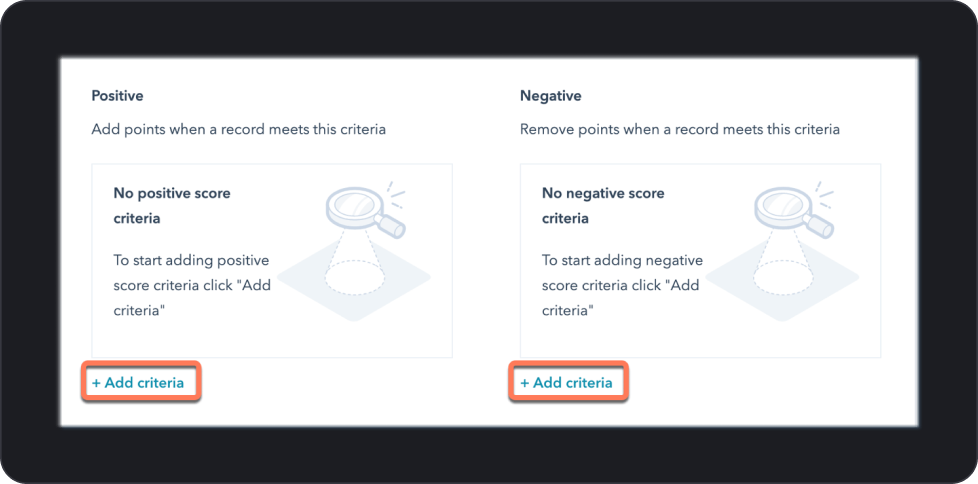
Pardot users know that lead scoring is vital to identifying qualified leads and scheduling actions based on that qualification. To set up lead scoring, click the settings gear on the top right, then choose Properties from the menu. Search for HubSpot Score, hover over it, and select Edit. Here, you can add positive and negative attributes to affect the score.

Pardot offers both lead scoring and lead grading, to illustrate lead interest and your interest in a lead. If this is a feature you value, you can clone the HubSpot Score category to have one score for customer intent and one score for company interest.
You can use lead scoring to segment lists and to enroll contacts in workflows. It’s a powerful tool to identify contacts that you want to engage with.
08 Create lead assignment rules
To migrate lead assignment, you need to know if this action takes place in Salesforce or Pardot. If lead assignment currently occurs in Pardot, then you can use the HubSpot Rotate workflow action to set up assignment rules.
If your assignments currently take place in Salesforce, we recommend rebuilding this in HubSpot. HubSpot offers better assignment features by building more granular workflows and using Teams to rotate records.
09 Build sales email templates
You can build email templates for your sales team to both optimize your sales teams’ time and control the quality of your email sends. Access this feature by clicking Templates under the Conversations tab. HubSpot even provides a number of pre-written templates in their library to help you get started.
10 Import records
Importing contact records may be the most important part of your migration, yet it’s surprisingly simple with HubSpot. You just need to export contacts, deals, companies, and tickets, and you can import in a few clicks by clicking the Import button on one of these screens. HubSpot automatically deduplicates your records so there’s no fear of cluttering your CRM.
If you have Sales Pro or Marketing Pro, you can also use the native HubSpot-Salesforce Integration to migrate your data. This method also provides you assistance from HubSpot Support. Before you import the records, ensure that you have created all the custom properties you need to have the most seamless migration.
Marketing Hub Tasks
11 Upload files
To begin building out your marketing assets, start with uploading your files. These include logo variations, headshots, stock photos, email banners, PDF downloads, one pagers, and anything else you need for emails or landing pages.
Under Marketing, hover on Files & Templates, then click Files. To make everything easier to navigate later, consider making folders first to house your uploads.
13 Create subscription types
Every email you send must belong to a subscription type. While you could have one catch-all subscription, creating specific types helps provide users the option to opt-out of certain emails without unsubscribing from all messages.
Under Settings, choose Marketing, then Email. Select Subscription Types from the top menu and click the Create Subscription Type button to make a new subscription. Common options to start with are Newsletter, Product Updates, and Promotions. You can always add more types later.
14 Create email templates
Make a list of all the email templates you need - newsletters, product updates, workflow templates, and sales messaging. Navigate to Emails under the Marketing tab, and click Create Email. Decide if you want this to be a one-time email or an automated email for Workflows - you cannot change this later.
Next, build your email. When you’re ready, click Actions, then Save as Email Template. This email will now be available to use as a template in the future.
.png)
15 Rebuild your emails
Once your templates are created, it’s time to rebuild the emails themselves. Create anything you’ll need for workflows as well as your next newsletter or email send.
16 Build landing pages
One of the most exciting parts of switching to HubSpot is access to the simple drag-and-drop landing page builder. Recreate your landing pages in HubSpot to access more tracking and the ability to include your page activities within Workflows.
Navigate to Website under the Marketing tab, then click Landing Pages. You can either build from scratch or use the Marketplace to find a landing page theme you love. Once your theme is selected, the landing page builder is similar to the email builder. Best of all, the landing pages are already mobile optimized so they look great on any device.
You can build your own custom landing pages by clicking on Marketing > Files and Templates > Design Tools. This is much more advanced, so we’d recommend looping in a web developer and taking advantage of the HubSpot Academy courses before you dive in.

17 Rebuild engagement studio programs as workflows
One of the biggest projects depending on your setup may be rebuilding engagement programs from Pardot into workflows in HubSpot. You can access Workflows under the Automation tab. Depending on your subscription, you may be able to build workflows based on contacts, companies, deals, support tickets, or quotes.
Mid-Flight Workflows
Don’t forget to plan what you’re going to do with the contacts who are currently in an
engagement program when you switch. This is one of the most complex parts of a live migration, since you’re rebuilding the plane while still flying it.
At Aptitude 8, we like to build workflows with “jump steps.” The workflow will find if a contact has received a certain email template; if not, it will be added to the proper stage within the process.
18 Recreate and embed website forms
Most importantly for capturing inbound leads, you must rebuild your forms within HubSpot and embed them onto your website. The HubSpot form builder uses simple drag-and-drop editing with the added benefit of using progressive profiling. When a user has previously completed a form and is cookied, then new fields will replace those that they have already completed.
The progressive fields can also have dependencies based on previously completed forms. This next level of contact information can empower your sales team to make deeper connections with your leads. Make sure that you only replace forms on a staging site or in drafts until you have everything connected and launched!
Swap the forms from Pardot to HubSpot
Pro Tip: We recommend doing this either at night or over a weekend - any other time you're anticipating your traffic to be down. |
Changing from one marketing automation software to another can be a daunting task - after all, all your data is at stake and you’ll be impacting how every member of your team works. But, we believe that investing in the right tools will positively impact every area of your business in time. That’s why we love helping companies move from tools like Pardot and Marketo to HubSpot Marketing Hub. Whether you’re in the market for a CRM, CMS, or MAP, HubSpot is our choice for empowering businesses.
Interested in working with a HubSpot partner?
Changing from one marketing automation software to another can be a daunting task - after all, all your data is at stake and you’ll be impacting how every member of your team works. But, we believe that investing in the right tools will positively impact every area of your business in time. That’s why we love helping companies move from tools like Pardot and Marketo to HubSpot Marketing Hub.
Whether you’re in the market for a CRM, CMS, or MAP, HubSpot is our choice for empowering businesses. If you need help migrating your Pardot instance over to Hubspot, let's chat!

What are your top priorities when evaluating a CRM?
In this blog, we'll take a look at what are or what would be common priorities for users when evaluating a potential new CRM solution.

HubSpot vs Salesforce Review: Cost, Setup, and Usability
Compare HubSpot and Salesforce across pricing, implementation, and management. Discover which CRM is more cost-effective and easier to use.


.png?width=300&height=168&name=Floqast%20-%20Feature%20Image%20(1).png)